Basic workflow in BonVision
There are five basic sections to making a workflow in BonVision:
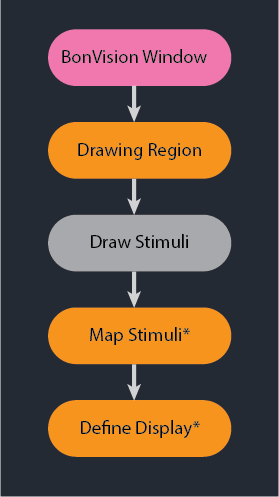
* Map Stimuli and Define Display are optional. They can be skipped when prototyping
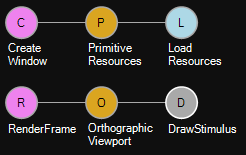
BonVision window
This loads up the basic resources (textures, etc) that would be used by BonVision. Th basic structure is:
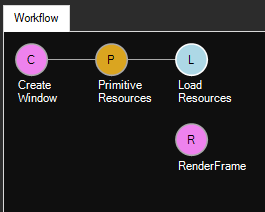
This includes: CreateWindow → PrimitiveResources → LoadResources and RenderFrame
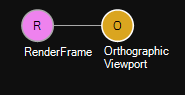
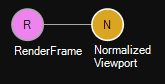
Drawing Region
This defines which region of visual space is used for the visual world. Note that this can be larger than the actual region used. Ideally one should use Orthographic Viewport. This defines everything in terms of visual angles.
If you are just prototypic stimuli, one can use Normalised Viewport.
Draw Stimuli
This is where you generate all the aspects of the visual environment. Covered in more detail in later sections.
(Note: in this case DrawStimulus is not a node but a ‘BehaviourSubject’ node with a name DrawStimulus)
Map Stimuli (optional)
This is where the stimulus is rendered onto a a surface. This can be skipped for prototyping. Ideally one should use SphereMapping. If SphereMapping is used, the Define display section next is necessary
Define display (optional)
Here we define the parameters of the display system (eg. monitor). It is defined as:
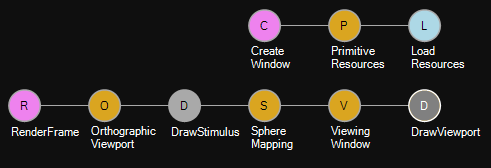
This includes a ViewingWindow → DrawViewport
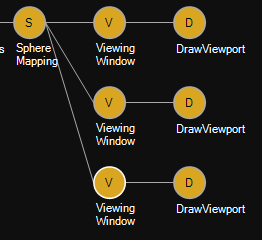
Adding additional displays is as simple as adding multiple define displays after the map stimulus like this: