Grating Series
As grating stimuli are commonly used in visual physiology experiments, we have created a few nodes that make it convenient to design experiments very easily. These include the nodes GratingTrial, CreateGratingTrial & GratingSpecifications. This page will elaborate two ways of creating a grating series experiment. The first, simplest is to use the pre-designed nodes. The second option discusses an option of loading the list of parameters from a csv file.
NOTE: On the page Stimulus Series we show two other methods of creating such a stimulus without using the pre-designed nodes, which can adapted for any stimulus type that you would like to use.
A. Simplest method: Using GratingSpecifications
This is the workflow called “X” in the examples folder.
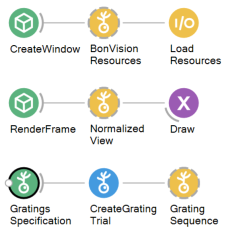
Step 1. Add the nodes
For this one just needs to have the three nodes in this order.
Step 2. Enter parameters of stimuli
You can then specify the parameters of the stimuli to run by clicking on the Collections. This opens up a list such as this.

Each row in this is one stimulus (set of parameters) or trial. You can add the specific values by adding numbers in the corresponding …
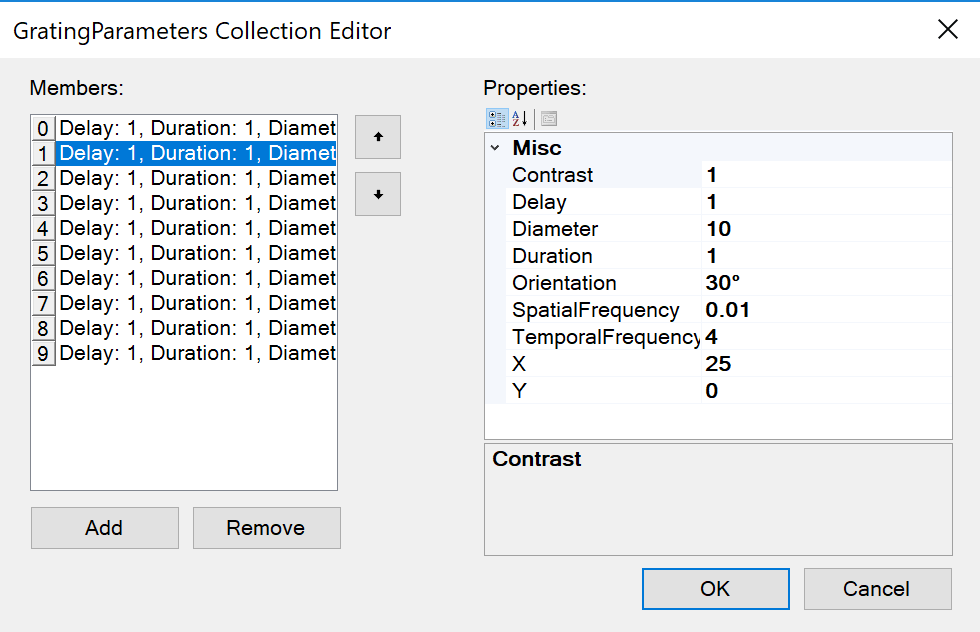
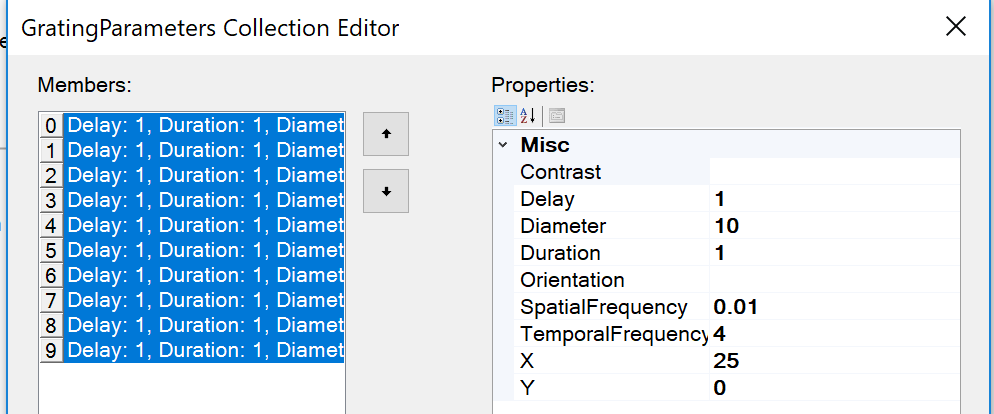
There are various feature in the editor, so play around with adding parameters here. For example, if you want to set a parameter across multiple trials, you can select multiple and enter the value. Note that only the parameters that do not change across all the trials are displayed when multiple rows are selected:
B. Alternate method: Loading parameters from a CSV file
This is the workflow called “X” in the examples folder. This is a version of the workflow that can run the same experiment, but loads the parameters of the grating stimulus from a csv file.
Step 3
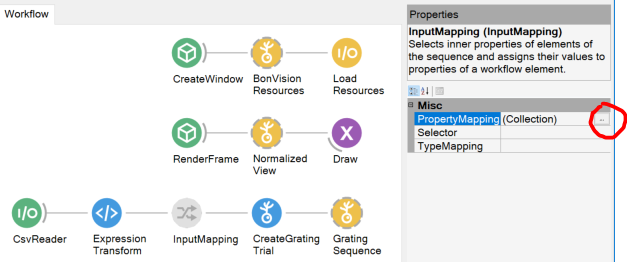
From Step 1 above, instead of the GratingSpecifications node, add three codes, CSVReader, ExpressionTransform & Input mapping.
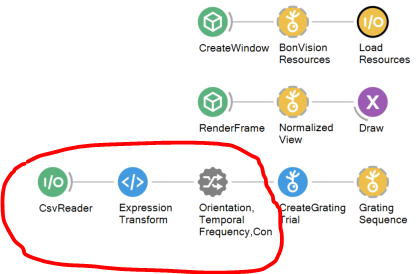
The first node reads a csv file, the second parses the csv file details, and the third part maps it onto the corresponding parameters of the CreateGratingTrial node.
Step 4. Setup the CSV reader
Add the path to the csv file and details of the file. Here ‘,’ is the separator, and the first line is skipped as it defines the columns.

Here is what the raw ‘gratings.csv’ file looks like:
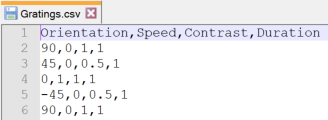
Below this is what the formatted version looks like. You can add additional trials by adding new rows to the file: B2.

Step 5. Setup the ExpressionTransform
Enter the details by expanding the details of the ExpressionTransform node
![]()
Here is the script within ExpressionTransform node
![]()
This follows from the csv files details, the first column goes to Orientation (in this case it is being converted to radians), the second column is speed, third is Contrast and the final one is Duration of the stimulus.
Step 6: Setup the InputMapping node
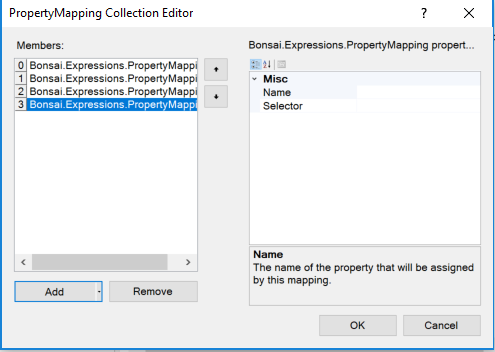
First have the InputMapping node between the ExpressionTransform and CreateGratingTrial nodes, and add the details within Collection.
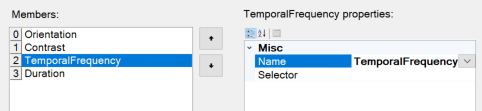
Add four members to the Collection on the left:
Then add the mapping. Name will show a drop-down menu of the properties from the CreateGratingTrial node that can be set. And choose the corresponding output from the ExpressionTransform node under Selector :
The page Stimulus Series has a more generic version of creating the same stimulus, without the benefit of having the additional nodes for creating grating stimuli.