Creating a series of stimuli
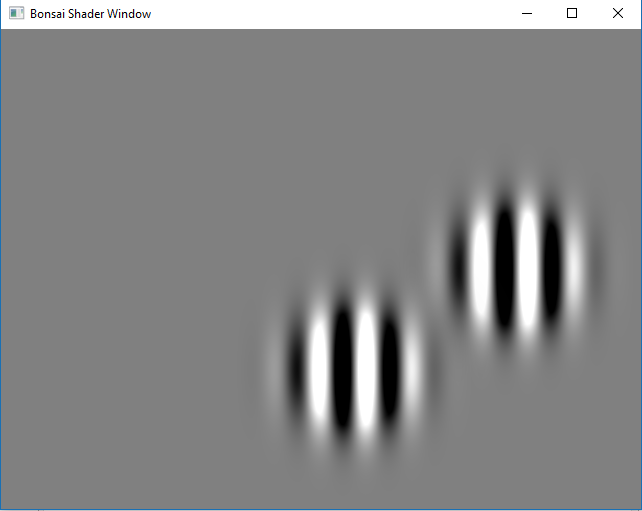
This will create a series of stimuli: gratings centred at different x-locations. We continue this from Creating basic stimuli: two stimuli
Do keep testing the stimuli frequently during the various steps to make sure it is working.
Step 0: Start from previous tutorial
Load up the stimulus created previously: Creating basic stimuli: two stimuli
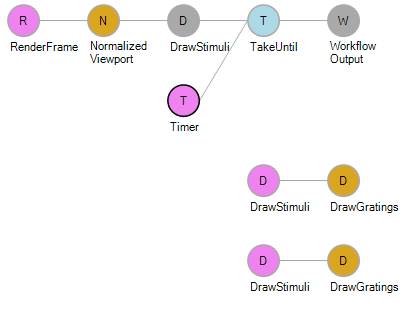
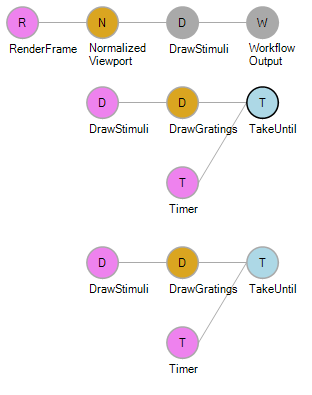
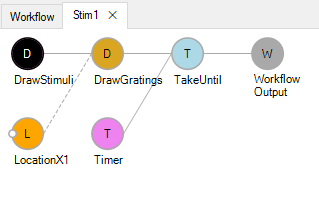
Step 1: Move the Timer to individual stimuli
Rather than have the Timer at the top running for all the stimuli, we can have the Timers attached to individual stimuli, which generates an identical output.
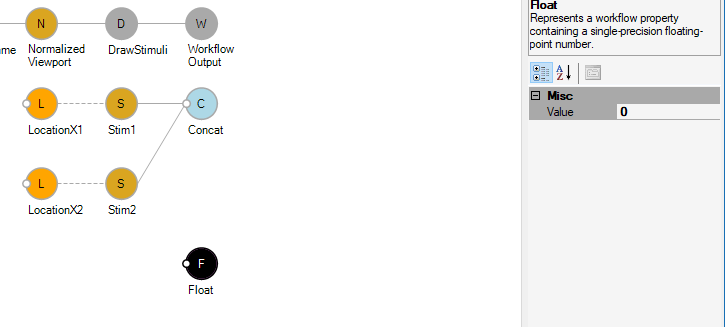
Step 2: Concat to make a series of Stimuli
We now use a Concat node from Bonsai on these two stimuli.
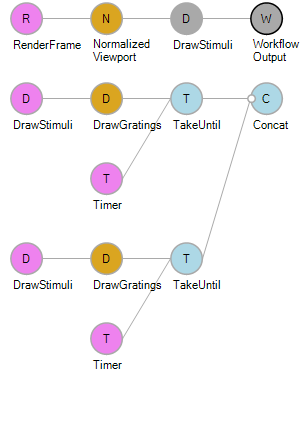
This runs the two stimuli one after another rather than together. If we just repeated the sections to the left of Concat now we can add all the stimuli we want. However, this can get quite cumbersome and unmanageable. So, we the next steps will help streamline the process.
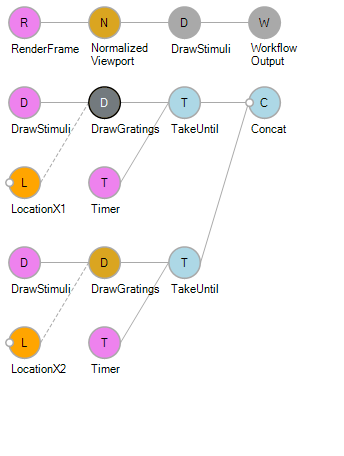
Step 3: Externalize property to vary
As we are trying to vary LocationX, it is easiest to expose this parameter outside, rather than having to change it within the properties of each DrawGratings node. For that we ‘Externalize Property’: by right clicking on the DrawGratings node and choose LocationX. Once externalized you can rename the the property.
(Note that you cannot have two externalized properties with the same name and so renaming is a necessary step in some cases)
Step 4: Group stimulus workflow
This step is to make things convenient to deal with, choose nodes and groups them together:
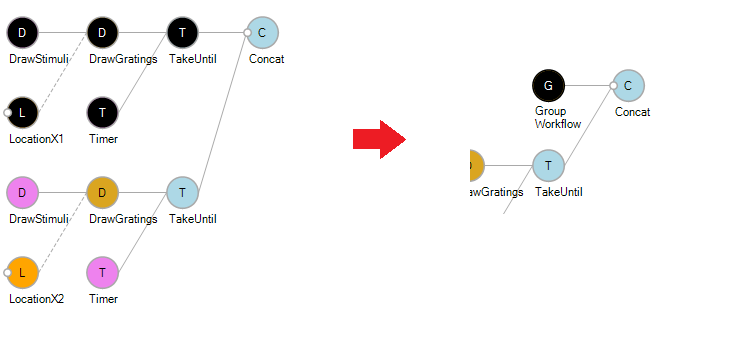
Rename the Grouped Workflow and do it for both stimuli for ease of interpretation.
If you double click on the Grouped parameter, you can edit the nodes within:
Step 5: Externalize variable parameter from group
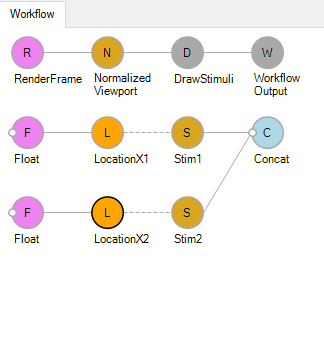
We can also externalize parameters from the groups the same way as we do for single nodes:
To control the values of the location parameters we can add to a Float nodes as inputs to each of them:
 ***
***
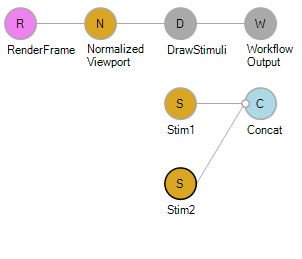
Step 6: Group as Create Observable
The following steps are a key strategy we use for creating stimulus series. We send in a series of parameter values into a single stimulus generator section, something grouped as a CreateObservable. First, delete the second stimulus (as this will no longer be required).

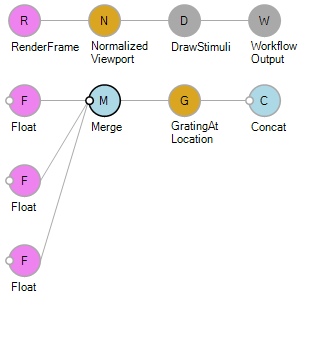
Add a second value by using a Merge node for two Floats before the LocationX1
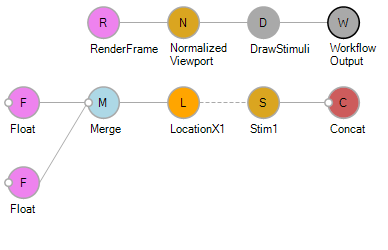
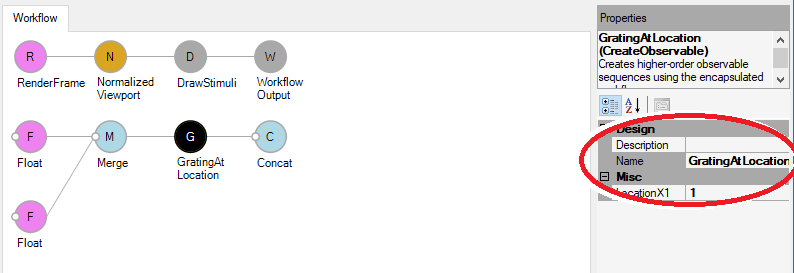
Now choose the nodes LocationX1 & Stim1 and group them as CreateObservable. (Right click on selected nodes and choose the CreateObservable option under Group).

Note how the Concat turns blue again as this is now works as having two streams. It is always good to rename grouped nodes to something that is more descriptive of the function. Here we rename it to GratingAtLocation
You can even add another Float to add an additional location
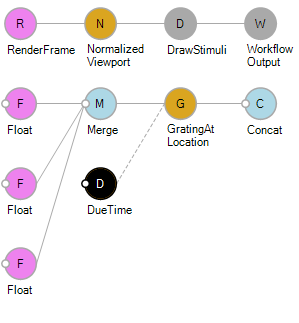
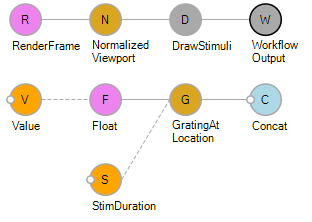
Step 7: Bringing out another variable (Stimulus Duration)
Just as an example, lets try and keep the stimulus duration as a variable that we can control from outside. For this, we will have to double-click into GratingAtLocation and into Stim1 within. Then Externalize ‘DueTime’ from the Timer.

We would then have to externalize DueTime again from Stim1 within GratingAtLocation.

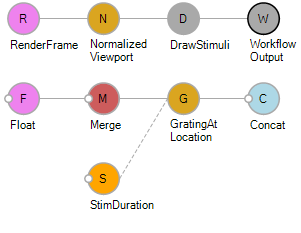
Finally, from GratingAtLocation in the main workflow. We can also rename the name to StimDuration

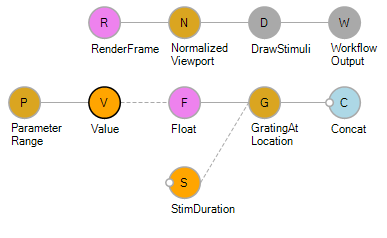
Step 8: Going over a range of parameters
We will now go over a range of parameters using the function PropertyMapping. These are the steps. First we just leave on float:
Then remove the merge
and externalise the value of float

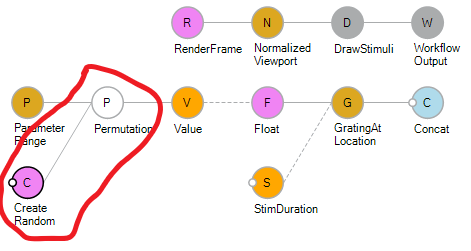
Now we use the ParameterRange node, setting the range and number of values on the right
Then connect it as an input to value
Step 9: Randomize presentation
Finally, we add a random shuffling of the order of the parameters by adding Permutation and Random nodes after the ParameterRange node.
(Note that Permutation and Random nodes need the Numerics package of Bonsai)